300x250
반응형
안녕하세요. J4J입니다.
이번 포스팅은 엑셀 파일 생성하여 다운로드하는 방법에 대해 적어보는 시간을 가져보려고 합니다.
반응형
엑셀 파일 생성 및 다운로드 방법
[ 1. 의존성 추가 ]
<!-- 엑셀 -->
<dependency>
    <groupId>org.apache.poi</groupId>
    <artifactId>poi</artifactId>
    <version>5.2.2</version>
</dependency>

<!-- 엑셀 -->
<dependency>
    <groupId>org.apache.poi</groupId>
    <artifactId>poi-ooxml</artifactId>
    <version>5.2.2</version>
</dependency>
[ 2. Controller 작성 ]
package com.excel.controller;

import org.apache.poi.ss.usermodel.*;
import org.apache.poi.xssf.usermodel.XSSFCellStyle;
import org.apache.poi.xssf.usermodel.XSSFColor;
import org.apache.poi.xssf.usermodel.XSSFFont;
import org.apache.poi.xssf.usermodel.XSSFWorkbook;
import org.springframework.web.bind.annotation.GetMapping;
import org.springframework.web.bind.annotation.RestController;

import javax.servlet.ServletOutputStream;
import javax.servlet.http.HttpServletResponse;

@RestController
public class ExcelController {

    @GetMapping("/download")
    public void download(HttpServletResponse res) throws Exception {
        /**
         * excel sheet 생성
         */
        Workbook workbook = new XSSFWorkbook();
        Sheet sheet = workbook.createSheet("Sheet1"); // 엑셀 sheet 이름
        sheet.setDefaultColumnWidth(28); // 디폴트 너비 설정

        /**
         * header font style
         */
        XSSFFont headerXSSFFont = (XSSFFont) workbook.createFont();
        headerXSSFFont.setColor(new XSSFColor(new byte[]{(byte) 255, (byte) 255, (byte) 255}));

        /**
         * header cell style
         */
        XSSFCellStyle headerXssfCellStyle = (XSSFCellStyle) workbook.createCellStyle();

        // 테두리 설정
        headerXssfCellStyle.setBorderLeft(BorderStyle.THIN);
        headerXssfCellStyle.setBorderRight(BorderStyle.THIN);
        headerXssfCellStyle.setBorderTop(BorderStyle.THIN);
        headerXssfCellStyle.setBorderBottom(BorderStyle.THIN);

        // 배경 설정
        headerXssfCellStyle.setFillForegroundColor(new XSSFColor(new byte[]{(byte) 34, (byte) 37, (byte) 41}));
        headerXssfCellStyle.setFillPattern(FillPatternType.SOLID_FOREGROUND);
        headerXssfCellStyle.setFont(headerXSSFFont);

        /**
         * body cell style
         */
        XSSFCellStyle bodyXssfCellStyle = (XSSFCellStyle) workbook.createCellStyle();

        // 테두리 설정
        bodyXssfCellStyle.setBorderLeft(BorderStyle.THIN);
        bodyXssfCellStyle.setBorderRight(BorderStyle.THIN);
        bodyXssfCellStyle.setBorderTop(BorderStyle.THIN);
        bodyXssfCellStyle.setBorderBottom(BorderStyle.THIN);

        /**
         * header data
         */
        int rowCount = 0; // 데이터가 저장될 행
        String headerNames[] = new String[]{"첫번째 헤더", "두번째 헤더", "세번째 헤더"};

        Row headerRow = null;
        Cell headerCell = null;

        headerRow = sheet.createRow(rowCount++);
        for(int i=0; i<headerNames.length; i++) {
            headerCell = headerRow.createCell(i);
            headerCell.setCellValue(headerNames[i]); // 데이터 추가
            headerCell.setCellStyle(headerXssfCellStyle); // 스타일 추가
        }

        /**
         * body data
         */
        String bodyDatass[][] = new String[][]{
            {"첫번째 행 첫번째 데이터", "첫번째 행 두번째 데이터", "첫번째 행 세번째 데이터"},
            {"두번째 행 첫번째 데이터", "두번째 행 두번째 데이터", "두번째 행 세번째 데이터"},
            {"세번째 행 첫번째 데이터", "세번째 행 두번째 데이터", "세번째 행 세번째 데이터"},
            {"네번째 행 첫번째 데이터", "네번째 행 두번째 데이터", "네번째 행 세번째 데이터"}
        };

        Row bodyRow = null;
        Cell bodyCell = null;

        for(String[] bodyDatas : bodyDatass) {
            bodyRow = sheet.createRow(rowCount++);

            for(int i=0; i<bodyDatas.length; i++) {
                bodyCell = bodyRow.createCell(i);
                bodyCell.setCellValue(bodyDatas[i]); // 데이터 추가
                bodyCell.setCellStyle(bodyXssfCellStyle); // 스타일 추가
            }
        }

        /**
         * download
         */
        String fileName = "spring_excel_download";

        res.setContentType("application/vnd.openxmlformats-officedocument.spreadsheetml.sheet");
        res.setHeader("Content-Disposition", "attachment;filename=" + fileName + ".xlsx");
        ServletOutputStream servletOutputStream = res.getOutputStream();

        workbook.write(servletOutputStream);
        workbook.close();
        servletOutputStream.flush();
        servletOutputStream.close();
    }
}
테스트
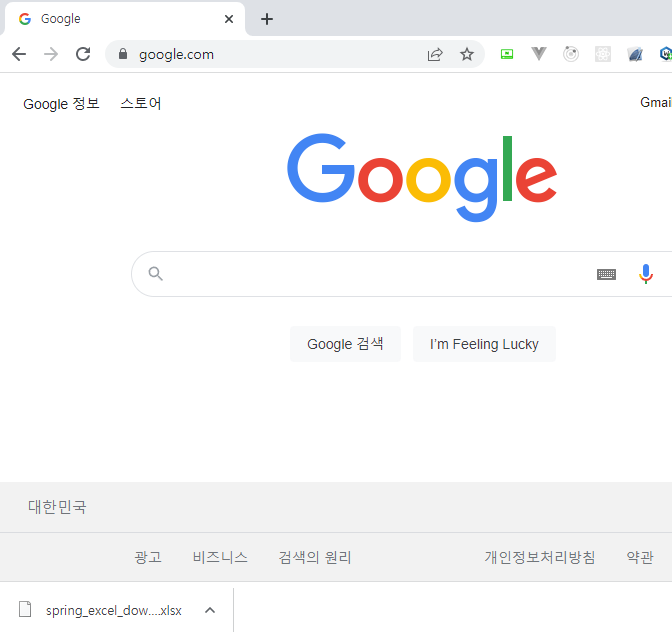
위와 같이 코드를 작성한 뒤 서버를 실행시킨 뒤 브라우저를 통해 api를 호출하면 다음과 같은 결과를 확인할 수 있습니다.
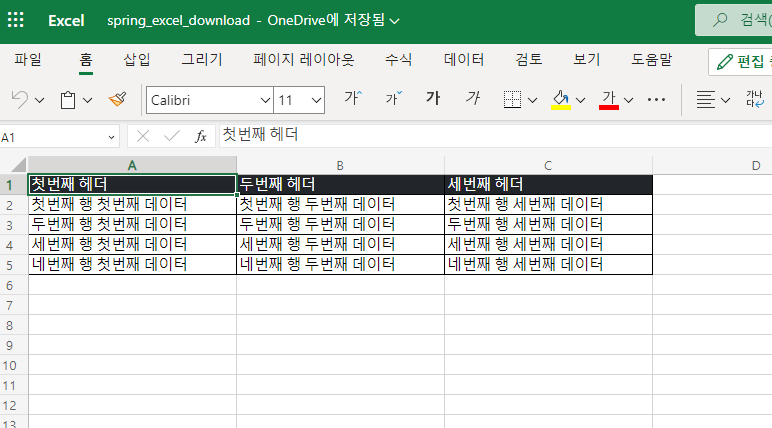
그리고 다운로드된 파일을 오픈해 보면 다음과 같이 코드로 설정했던 값대로 엑셀 파일이 만들어진 것을 확인할 수 있습니다.
이상으로 엑셀 파일 생성하여 다운로드하는 방법에 대해 간단하게 알아보는 시간이었습니다.
읽어주셔서 감사합니다.
728x90
반응형
'Spring > SpringBoot' 카테고리의 다른 글
| [SpringBoot] WebClient를 이용하여 외부 API 호출하기 (1) | 2023.03.15 |
|---|---|
| [SpringBoot] QueryDSL where절에 1=1 사용하기 (0) | 2023.01.25 |
| [SpringBoot] 이메일 발신하기 (0) | 2023.01.16 |
| [SpringBoot] encodeURIComponent, decodeURIComponent 사용하기 (0) | 2022.12.29 |
| [SpringBoot] AWS Lambda로 배치 만들기 (3) - GitLab으로 자동배포하기 (0) | 2022.12.15 |


댓글