안녕하세요. J4J입니다.
이번 포스팅은 styled-componets에 tree shaking을 적용하는 방법에 대해 적어보는 시간을 가져보려고 합니다.
이전에 올렸던 글인 [React] Tree Shaking으로 최적화하기를 통해 리액트에서 webpack을 이용하여 tree shaking 하는 방법은 모두 끝났다고 생각을 했었습니다.
하지만 css사용을 위해 제가 즐겨 사용하던 styled-components에 tree shaking이 적용되지 않는 현상을 발견할 수 있었습니다.
해결방법을 알게 되어 서로서로(?) 공유하고자 글을 적게 되었습니다.
StyledComponetns Tree Shaking 적용 방법
우선 tree shaking이 적용되지 않는 상황을 간단하게 보여드리겠습니다.
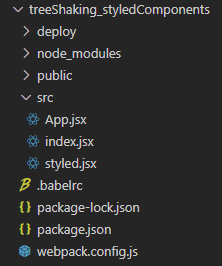
이전 글에 적어둔 tree shaking설정을 모두 적용하고 다음과 같이 styled.jsx파일을 App.jsx파일과 동일한 위치에 만들어보겠습니다.
import styled from 'styled-components';

export const StyledMainDiv = styled.div`
    width: 200px;
    height: 200px;
    margin: 0 auto;
    padding: 10px;
    border: 1px solid orange;
`;

export const StyledSubDiv = styled.div`
    width: 100px;
    height: 100px;
    margin: 10px;
    padding: 8px;
    box-shadow: 2px 2px 4px tomato;
`;
그리고 App.jsx에서 MainDiv만 가져와서 사용해보겠습니다.
import * as React from 'react';
import { StyledMainDiv } from './styled';

const App = () => {
    return (
        <section>
            <StyledMainDiv>
                <h4>StyledComponets Tree Shaking...</h4>
            </StyledMainDiv>
        </section>
    )
}

export default App;
위와 같이 파일들을 만들고 빌드를 해보면 다음과 같이 빌드가 됩니다.
// bundle.js

var c=u.a.div(r||(r=s(["\n    width: 200px;\n    height: 200px;\n    margin: 0 auto;\n    padding: 10px;\n    border: 1px solid orange;\n"]))),
f=(u.a.div(a||(a=s(["\n    width: 100px;\n    height: 100px;\n    margin: 10px;\n    padding: 8px;\n    box-shadow: 2px 2px 4px tomato;\n"]))),
function(){
    return l.createElement("section",null,l.createElement(c,null,l.createElement("h4",null,"StyledComponets Tree Shaking...")))});
    i.a.render(l.createElement(f,null),document.querySelector("#root"))
}
SubDiv는 사용하지 않았지만 SubDiv에만 존재하는 css인 box-shadow가 빌드 파일에 포함되어 있는 것을 확인할 수 있습니다.
또한 번들 파일 크기는 다음과 같이 나옵니다.

이제 사용되지 않는 컴포넌트는 빌드되지 않게 설정해보겠습니다.
[ 1. 패키지 설치 ]
$ npm install -D babel-plugin-styled-components@experimental
[ 2. babel 설정 파일 수정 ]
{
    "presets": [
        ...
    ],

    "plugins": [
        [
            "babel-plugin-styled-components", {
                "pure": true
            }
        ]
    ]
}
위와 같이 설정하고 다시 빌드를 하게 되면 다음과 같이 번들 파일이 나오게 됩니다.
// bundle.js

var r=n(0),a=n(6),l=n.n(a),o=n(2),i=o.a.div.withConfig({displayName:"styled__StyledMainDiv",componentId:"u94nuk-0"})(["width:200px;height:200px;margin:0 auto;padding:10px;border:1px solid orange;"]),
u=function(){
     return r.createElement("section",null,r.createElement(i,null,r.createElement("h4",null,"StyledComponets Tree Shaking...")))};
     l.a.render(r.createElement(u,null),document.querySelector("#root"))
}
실제로 실행에 사용되고 있는 MainDiv만 나오는 것을 확인할 수 있습니다.
그리고 번들 파일 사이즈도 다음과 같이 나옵니다.

이전에 빌드되던 상황보다 사이즈가 줄어든 것도 확인할 수 있습니다.
파일 구성
참조
Tree Shaking Styled Components
이상으로 styled-componets에 tree shaking을 적용하는 방법에 대해 간단하게 알아보는 시간이었습니다.
읽어주셔서 감사합니다.
'SPA > React' 카테고리의 다른 글
| [React] Hooks - useState (0) | 2021.09.05 |
|---|---|
| [React] Hooks - useEffect (0) | 2021.09.02 |
| [React] Tree Shaking으로 최적화하기 (0) | 2021.08.31 |
| [React] 타입 스크립트 환경에서 정적 이미지 파일 사용하기 (0) | 2021.08.24 |
| [React] 정적 이미지 파일 사용하기 (0) | 2021.08.24 |


댓글